
|
Waving Fish |

|
© 2011 Waving Fish - PO Box 23 - Bonnerdale, AR 71933 |
|
Vines, Wines, and Music |
|
The size of each area will depend on how many vines you want to try to propagate. The first will have to be large enough (and deep enough if you are using a raised bed) to be able to bury a bundle of cuttings vertically and cover them completely with at least two inches of soil. The second will have to accommodate your cuttings with a spacing of approximately 6” between them.
The soil in both areas should be as rich in organic compost and nutrients as possible and loose, not compacted, with sufficient drainage. Cynthiana babies need to be moist, but not wet.
In the first area, dig a hole or a trench large enough to hold your bundles of cuttings vertically and deep enough to bury them with the amount of soil described earlier.
THE FOLLOWING STEPS SHOULD OCCUR ABOUT A MONTH BEFORE THE LAST FROST FOR YOUR AREA.
STEP 2: Preparing the cuttings
Your cuttings will have two ends, a straight cut end and an angle cut end. The straight cut end is the basal end (bottom) of the cutting. Cut about a quarter of an inch of the basal end to expose fresh pith (center) and green around the pith. Bundle your cuttings using string putting no more than 25 cuttings in a bundle. Stand the bundle upright with the basal end down in a bucket filled with three to six inches of water, and let them soak for 24 hours.
STEP 3: Rooting hormone
We recommend Dip’N Grow liquid concentrate diluted 5 parts water to 1 part concentrate. You can get Dip’N Grow at most garden centers for under $10 for a 2 oz bottle. If you have trouble finding it you can go on Dip’N Grows website and find a retailer or order online at http://www.dipngrow.com. Prepare your rooting hormone solution in a container that will allow you to dip your entire bundle’s basal end into the solution, allowing it to wet the bottom 2” of the stem. Dip the bundle in for 3 to 5 seconds. Longer is NOT better.
STEP 4: Callus the cuttings
Place the bundled cuttings BASAL END UP, SLANTED CUT DOWN in the hole or trench that you prepared in the callusing bed in STEP 1. Bury the cuttings completely making sure to cover the basal ends with at least one or two inches of soil, but not more. The reason you are doing this is so that the heat from the early spring sun can warm the basal area. Heat promotes callusing and without callusing rooting cannot occur.
STEP 5: Wait and water – But not too much
You will leave your cuttings in the callusing bed for 30-40 days, but no longer. If you allow calluses to form long, but very tender, roots the shock of moving them to the first season growing area will likely cause them to fail. You will want to keep the bed slightly moist. This is a little tricky because watering will cool the ground and what you are wanting is warm ground. So, be careful with how much or often you water.
STEP 6: Setting out the cuttings
After your cuttings have been in the callusing bed for 30-40 days you’ll be ready to set the plants out in the location they will stay for the first growing season. Be very careful when handling the cuttings because you don’t want to knock off the calluses or any beginning roots. Use a stick about ¾ to 1” in diameter to poke enough holes in the soil about 4” deep and about 6” apart to hold your individual callused cuttings. Carefully place a cutting BASAL END DOWN, SLANTED CUT UP in each hole and gently fill in the soil around the cuttings. Water the cuttings in thoroughly being careful not to drown them.
STEP 7: Caring for the cuttings the first season
First, be patient. It can take a few weeks before your cuttings start to show signs of life. Remember, their main mission this year is to grow roots and not foliage. Foliage, however, is important as the season wears on to provide photosynthesis for the growing plants. Keep the soil moist. We recommend a simple drip irrigation system or soaker hose.
When the plants begin to develop leaf buds, you’ll want to begin protecting them against pests. Cynthiana are reasonably resistant to many grape vine pests, but not all. Some of the pests that you’ll want to guard against are fungus, leaf rollers, chewing insects, and browsing animals. Early in the season, fungus is the primary problem you’ll face. DO NOT USE FUNGICIDES WITH SULFUR. Cynthiana is sensitive to sulfur and you could kill your new plants. If you want to stay organic, we recommend a liquid copper fungicide solution sprayed on the foliage once a week during the rainy season. If there’s rain in the forecast it’s, also, a good practice to spray JUST BEFORE the rain. It’s counter intuitive, but it provides the best protection. Your fungicide treatments are PREVENTATIVE not curative. You want to prevent fungus from forming from the very beginning.
The next pests you’ll need to protect against are caterpillars such as leaf rollers. Dipel Dust, powdered BT (bacillus thuringiensis) is a great organic way to deal with these insects. Wait until you see a few on your leaves before sprinkling on the BT. If the pest pressure is not too great, then don’t even bother. Try not to get too worked up about a few caterpillars. That said, if there starts to be more and more go after them with the BT.
Perhaps the hardest pests with which you must deal are the browsing animals – like deer and rabbits. For rabbits, a low fence is often enough. The deer can be a little trickier unless you go to great expense. If you can find enough human hair cuttings (like at the salon or barbershop) you can sprinkle them around your cuttings. Deer are very sensitive to smell – especially human smells. We’ve hung deodorant soap bars every few feet above the vines with some success. Another good affordable strategy is a “fence” of fishing line suspended about 6” off the ground and about two feet out from the perimeter of the bed. Deer can’t see it and it startles them when their ankles touch it. Finally, a single strand electric fence strung about four feet off the ground smeared with peanut butter will make a shockingly profound impression on a deer and encourage them to nibble elsewhere.
STEP 8: Let them go dormant
By August you should know which cuttings succeeded and which cuttings failed. When the cuttings go dormant in the fall it will be harder to tell them apart except the failures will be the ones that show no growth. Go ahead and pull up and discard the failures. It might be instructional to examine the rooting end to see if there was any progress prior to failure. It may help you make better decisions next time.
Let the successful cuttings go dormant in the fall. You will dig them up in the early spring and set them out in rows that will become your new Cynthiana vineyard. |
|
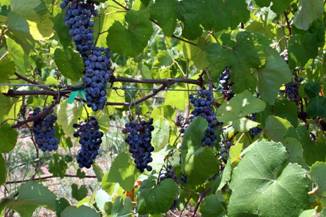
Propagating Cynthiana from Cuttings
By Tom & Karen Cantrell |
|
NOTE: If you cannot start propagating your cuttings right away, keep the cuttings moist and cold – between 35-40 degrees Fahrenheit. |
|
STEP 1: Prepare the ground.
You’ll need to have two areas prepared for your plants. The first is a callusing bed where your cuttings will spend their first 30-40 days. The second area is where you will set out your plants for the first growing season. |
|
NOTE: We offer this instructions free of charge because we love this variety and hope to get more folks interested in propagating and growing Cynthiana. However, if you find this information of value we would very much appreciate a donation of any amount you feel is appropriate. Thank you very much in advance for your generous help in our success!
|